How To Preserve A Puzzle | 3 Methods Using Glue, Tape, Or Mounting
Learn how to preserve a puzzle using glue, adhesive sheets, or foam board mounting. Simple methods to keep your finished puzzle intact and ready to frame.
Mar 13, 20267.7K Shares256.7K Views
The Best Ways To Preserve A Completed Puzzle
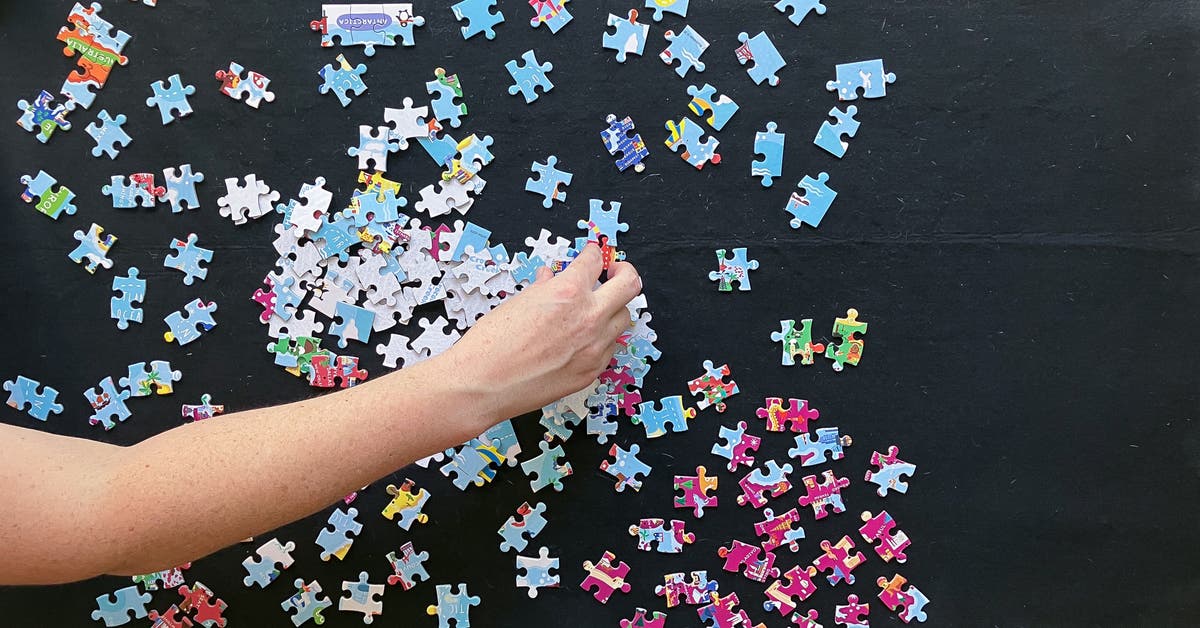
You finish the last piece, lean back, and realize the puzzle is too good to break apart. That’s the moment most puzzlers hesitate: glue it, tape it, frame it, or risk moving it and watching the edges collapse.
If you're wondering how to preserve a puzzle, the key is choosing the right method before you start. Small mistakes like using too much glue, skipping proper backing, or moving the puzzle too soon can lead to warping, bubbles, or loose pieces.
In the sections ahead, you’ll learn:
- the three most reliable ways to preserve a puzzle
- when puzzle glue works best and when it doesn’t
- how to prevent bubbles, warping, and loose pieces
- how to prepare and frame a preserved puzzle
- and a few creative ways to display your finished puzzle
By the end, you’ll know exactly how to preserve a puzzle so it stays intact and looks great for years.
How To Preserve A Puzzle With Glue

How to Glue a Puzzle
Using puzzle glue is the most common and reliable way to preserve a completed puzzle. When applied correctly, the glue bonds the cardboard puzzle pieces together and seals the surface so the puzzle can be safely moved, framed, or displayed as wall art.
Materials You’ll Need To Preserve A Puzzle With Glue
Before starting, gather everything so the puzzle stays stable during the process.
- Puzzle glue or puzzle conserver
- A foam brush, plastic spreader, or applicator
- Wax paper or parchment paper
- Cardboard, poster board, or a puzzle board
- A clean, dry cloth or plastic scraper
- Optional: adhesive sheets, foam board backing, or a puzzle frame
Step 1: Prepare The Puzzle Before You Glue Anything
Start by checking that the puzzle is fully completed and lying completely flat. Press down any raised edges or slightly lifted pieces, especially around the outer border and in areas where several similar pieces meet. Even a small lifted edge can create a bump under the glue and make the final finish look uneven.
If possible, slide wax paper or parchment paper underneath the puzzle before you begin. This protects the table and keeps any excess puzzle adhesive from sticking to the surface while it dries.
Step 2: Test Your Glue And Plan Your Coverage
Before pouring glue over the full surface, check the label for drying instructions and finish type. Some puzzle glue products dry glossy, while others leave a more natural finish. Knowing that in advance helps you avoid surprises, especially if the puzzle has dark artwork or a soft matte look you want to preserve.
It also helps to estimate how much glue you need before starting. A common mistake is pouring out far too much at once. You only need enough to create a thin, even coat across the image. It is easier to add a little more than to remove excess later.
Step 3: Apply The Puzzle Glue Evenly Across The Front
Pour a small amount of clear puzzle glue into the center of the puzzle. Then use your spreader, foam brush, or built-in applicator to move the glue outward in slow, even strokes.
Work from the center toward the edges so you can control the coverage more easily. Make sure the glue reaches all corners and edge pieces, since these areas are most likely to loosen later. The goal is not to soak the puzzle. The goal is to create a thin seal that lightly coats the full surface.
Step 4: Work The Glue Into The Seams Without Overloading The Surface
Once the front is covered, go back over the puzzle with gentle pressure so the puzzle glue settles into the gaps between pieces. This is one of the most important parts of the process because those seams are what actually need to bond.
At the same time, avoid scrubbing or pushing too hard. Too much pressure can shift pieces slightly or create glue buildup in certain spots. If you notice the glue pooling in the seams or collecting in visible streaks, that usually means you have applied too much.
Step 5: Remove Excess Glue And Check For Bubbles
Before leaving the puzzle to dry, inspect the entire surface under good light. Look across it from an angle rather than straight down. This makes it much easier to spot air bubbles, thick patches, or areas where the glue is uneven.
Step 6: Let The Puzzle Dry Fully On A Flat Surface
Leave the puzzle alone until it is fully dry. Do not test the corners, lift it to check underneath, or try to frame it too early. Even if the top feels dry after an hour or two, the adhesive may still be curing between the seams.
The puzzle should stay on a flat, stable surface the entire time. Drying on an uneven surface can lead to warping, especially with larger cardboard puzzles. If the room is humid, drying may take longer than expected.
Step 7: Check Whether The Puzzle Needs A Second Coat
After the first coat dries, gently inspect the puzzle. If it feels stable, the seams are bonded, and the surface looks evenly sealed, one coat may be enough.
If some pieces still feel loose or the surface coverage looks patchy, apply a second light coat rather than a heavy one. A thin second layer is usually much better than overloading the puzzle during the first pass.
Step 8: Reinforce The Back If You Want Extra Stability
Once the front is fully dry, decide whether the puzzle needs support on the back. For smaller puzzles going directly into a snug frame, front glue alone is often enough. For larger puzzles, especially 1000-piece puzzles and above, reinforcement can make a big difference.
How To Preserve A Puzzle With Adhesive Sheets Or Tape
If you want to preserve a puzzle without coating the front image with glue, using puzzle adhesive sheets or painter’s tape is a simple and effective method. Instead of sealing the top surface, this technique secures the puzzle from the back, allowing the artwork to remain completely unchanged.
Materials Needed To Preserve A Puzzle With Adhesive Sheets Or Tape
Before starting, gather the following items so you can complete the process without disturbing the puzzle:
- Puzzle adhesive sheets or wide painter’s tape
- Poster board, cardboard, or puzzle board
- A craft knife or scissors
- Optional: foam board backing for extra support
- Optional: a clean cloth or scraper for smoothing
Step 1: Stabilize The Puzzle Before Moving It
Before flipping the puzzle, make sure it is stable. Slide a large piece of poster board or cardboard underneath the puzzle so it can be lifted without shifting the pieces.
Move slowly and support the entire puzzle surface. Large puzzles, especially 1000-piece puzzles or larger, can easily separate if lifted without a solid backing.
Step 2: Secure The Puzzle For Flipping
Place a second board on top of the puzzle so it forms a “sandwich” with the puzzle in the middle. Hold both boards firmly and flip them together so the puzzle is now face down and the back of the puzzle pieces is exposed.
This technique keeps the pieces aligned and prevents sections from breaking apart during the flip.
Step 3: Apply Adhesive Sheets Or Tape Across The Back
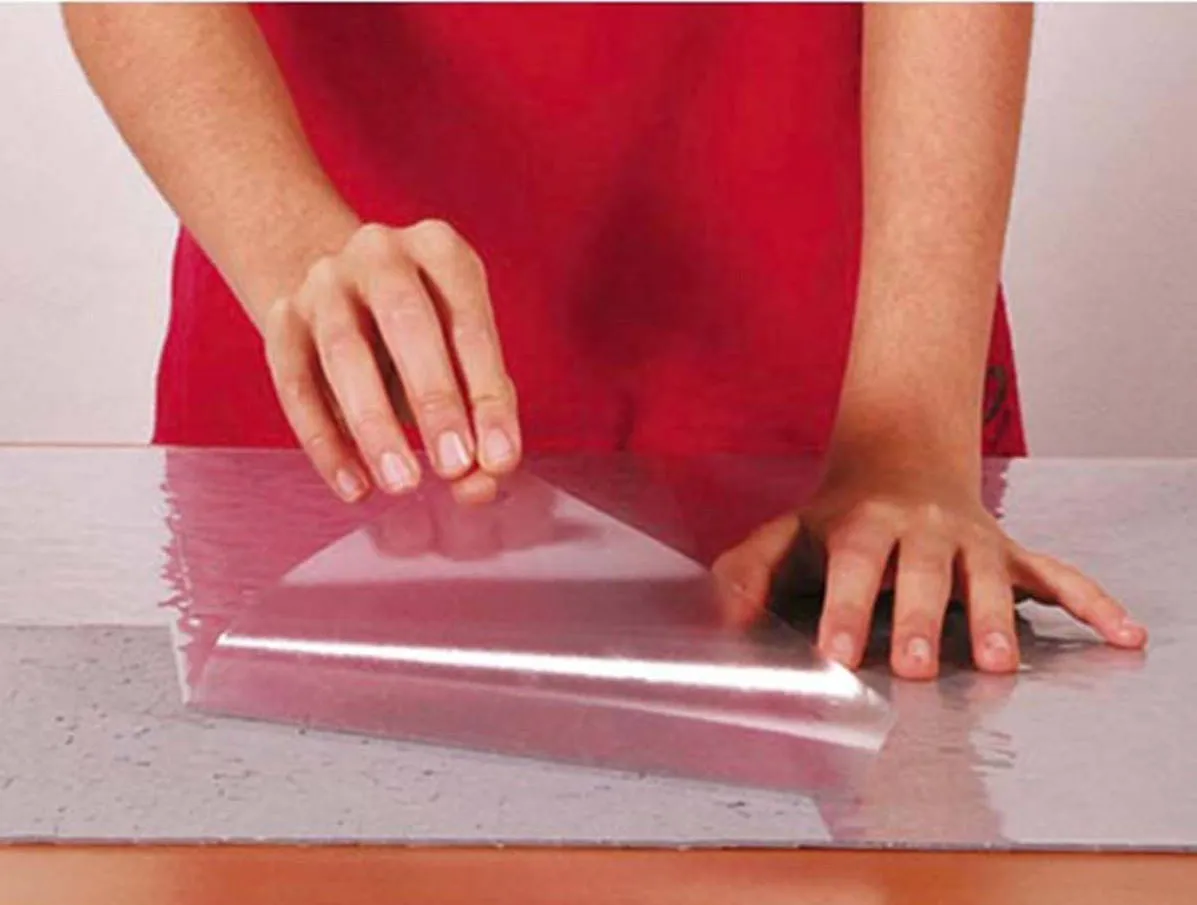
Once the puzzle is face down, begin covering the back with puzzle adhesive sheets or strips of wide painter’s tape.
If you’re using adhesive sheets:
- Peel the backing slowly.
- Lay the sheet flat across the puzzle back.
- Smooth it outward to remove air pockets.
If you’re using tape:
- Place the first strip horizontally across the puzzle.
- Continue adding strips until the entire back is covered.
The goal is to create a continuous backing layer that connects every puzzle piece.
Step 4: Reinforce The Puzzle In Multiple Directions
After covering the puzzle once, add additional strips of tape in the opposite direction (vertical or diagonal). This cross-pattern helps strengthen the puzzle structure and reduces the chance of pieces separating later.
Step 5: Smooth And Press The Backing Firmly
Use your hands, a cloth, or a plastic scraper to press the adhesive sheets or tape firmly across the entire back of the puzzle.
Pay special attention to:
- Edges and corner pieces
- Areas with many small seams
- Spots where tape overlaps
This pressure ensures the adhesive bonds to each piece and prevents loose puzzle pieces later.
Step 6: Trim The Edges For A Clean Finish
Once the backing is secure, trim any excess tape or adhesive sheet around the edges using scissors or a craft knife.
Cutting along the outer puzzle shape keeps the puzzle neat and makes it easier to mount or place inside a puzzle frame.
Step 7: Add Foam Board Backing If Needed
If the puzzle will be displayed or framed, consider attaching it to foam board backing after the adhesive sheets are applied.
This adds rigid support and helps prevent bending or sagging over time, especially with large puzzles or puzzles that will hang vertically on a wall.
Why This Method Works
Adhesive sheets and tape create a flexible reinforcement layer across the back of the puzzle. Instead of sealing the image surface, the backing connects the pieces from behind.
This approach works particularly well when:
- You want to preserve the original puzzle artwork without a glossy finish.
- You prefer a glue-free puzzle preservation method.
- The puzzle will be displayed inside a tight-fitting frame that provides additional support.
Because the front image is untouched, the puzzle keeps its original color, texture, and printed details.
How To Preserve A Puzzle With Mounting On Foam Board
How to Crafts / How to Mount a Puzzle on Foam Board
Mounting a puzzle onto foam board backing is one of the most reliable ways to create a stable, frame-ready display piece. While puzzle glue or adhesive sheets hold the pieces together, foam board adds the structural support needed to keep the puzzle flat and prevent bending over time.
Materials Needed To Preserve A Puzzle With Mounting On Foam Board
Before starting, prepare all materials so you can mount the puzzle without shifting the pieces.
- Foam board or mounting board
- Spray adhesive or puzzle glue
- Craft knife or scissors
- Ruler or straight edge
- Poster board or cardboard for lifting the puzzle
- Optional: puzzle frame or wall hanging hardware
Step 1: Measure The Puzzle Carefully
Begin by measuring the exact dimensions of your completed jigsaw puzzle. Use a ruler or measuring tape to determine both the width and height.
Once you have the measurements, mark those dimensions on your foam board backing. Precision matters here if the board is too small, parts of the puzzle may hang over the edges. If it’s too large, the edges may be visible when framing.
For the cleanest result, cut the foam board so it matches the puzzle size as closely as possible.
Step 2: Cut The Foam Board To Size
Using a craft knife and a straight edge, carefully cut the foam board along the marked lines. It’s better to make several light passes with the knife rather than trying to cut through the board in one motion.
A clean, straight cut helps ensure the puzzle sits flat and makes the final display look more professional. Before applying the adhesive, place the puzzle over the foam board to confirm the size fits perfectly.
Step 3: Prepare The Puzzle For Mounting
If the puzzle has not already been preserved, make sure it is fully assembled and stable before moving it. Slide a piece of cardboard or poster board underneath the puzzle so you can lift it without breaking the pieces apart.
For puzzles that have already been sealed with puzzle glue, confirm that the glue has completely dried before mounting. Handling the puzzle gently at this stage prevents pieces from shifting when it is placed onto the adhesive.
Step 4: Apply Adhesive Evenly To The Foam Board
Next, apply a thin, even layer of spray adhesive or puzzle glue across the foam board surface.
If using spray adhesive:
- Work in a well-ventilated area.
- Spray evenly across the entire board from about 6–8 inches away.
- Avoid spraying too heavily in one area.
If using puzzle glue:
Spread a thin coat across the board using a foam brush or spreader.
The goal is to create a consistent adhesive layer so the puzzle bonds evenly to the backing.
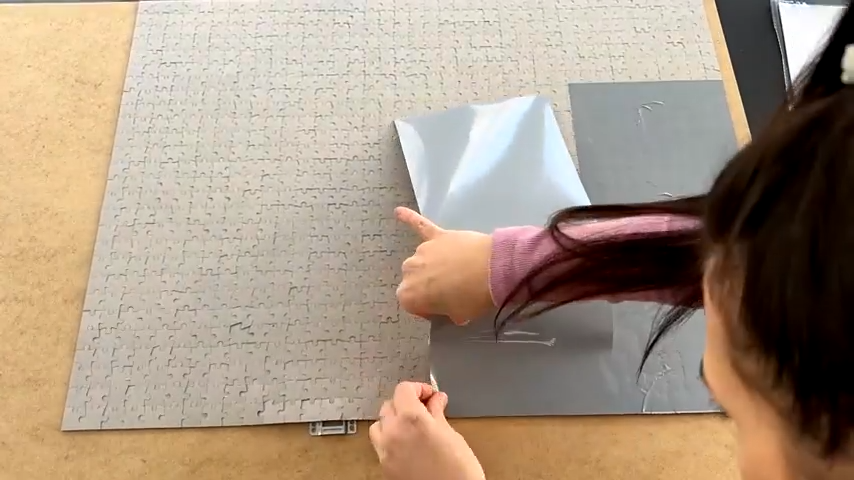
Step 5: Position The Puzzle Onto The Foam Board
Carefully lower the puzzle onto the prepared foam board. Start by aligning one edge of the puzzle with the board, then slowly lower the rest into place.
Lowering the puzzle gradually helps prevent air pockets or trapped bubbles between the puzzle and the board. Once positioned, avoid sliding the puzzle around too much, as this can weaken the adhesive layer.
Step 6: Press The Puzzle Evenly Onto The Board
After the puzzle is placed, gently press across the entire surface using your hands, a cloth, or a flat object like a book.
Focus especially on:
- Edges and corner pieces
- Areas where many puzzle seams meet
- Sections where pieces may feel slightly raised
Applying even pressure helps ensure every piece bonds securely to the foam board backing.
Step 7: Allow The Adhesive To Fully Dry
Let the mounted puzzle rest on a flat surface until the adhesive has completely cured. Drying time will depend on the adhesive used, but allowing several hours or overnight provides the most secure bond.
Avoid moving or framing the puzzle too early. Even if the surface feels dry, the adhesive underneath may still be curing. Once dry, the puzzle becomes a rigid mounted panel that can be framed or hung easily.
Why Foam Board Mounting Is Effective
Foam board acts as a rigid structural backing that prevents the puzzle from flexing. Without this support, even preserved puzzles can gradually bend or sag when displayed vertically.
Mounting the puzzle also makes framing easier because the puzzle behaves more like a single solid panel rather than a flexible collection of pieces.
This method works particularly well when:
- Displaying large puzzles on a wall
- Creating framed puzzle wall art
- Transporting a puzzle without pieces shifting
How To Frame A Preserved Puzzle
Getting My Puzzle Framed // Preserve My Puzzle
Framing is the final step that turns a preserved puzzle into a clean, intentional display piece. A good frame doesn’t just hold the puzzle; it protects the cardboard puzzle pieces, keeps the surface flat, and helps the artwork last longer on your wall.
Choosing The Right Frame
Start by measuring the actual size of the preserved puzzle, not the dimensions printed on the puzzle box. Even small variations in piece fit or preservation methods can slightly change the final size. In addition, adding foam board backing or mounting board increases the overall thickness.
For the best long-term results, choose framing materials designed to protect paper-based artwork. The Library of Congress recommends acid-free boards and protective glazing when framing paper items to reduce long-term deterioration and discoloration.
Best Framing Choices For Puzzle Preservation
- Acid-free backing board:prevents chemical reactions that can discolor cardboard over time
- UV-filtering acrylic or glass:Reduces the most damaging ultraviolet light exposure
- Deep-set frames:Provides enough space for the puzzle thickness and backing board
- Sturdy frame clips or backing hardware:Helps keep the puzzle secure inside the frame
A frame that is slightly deeper than standard poster frames often works best for framed puzzles, especially when foam board or adhesive backing is used.
Mounting The Puzzle Inside The Frame
Before placing the puzzle into the frame, make sure it has been fully preserved using puzzle glue, adhesive sheets, or foam board mounting. The puzzle should feel stable when lifted and should not shift or separate.
To Frame The Puzzle Properly:
- Check that the puzzle is completely dry and stable: If glue was used, confirm the adhesive has fully cured.
- Place the backing board into the frame first: Many frames include a cardboard backing that sits behind the artwork.
- Position the puzzle carefully inside the frame: Align the edges so the puzzle sits evenly within the frame borders.
- Secure the puzzle with the frame backing: Use frame clips or tabs to hold everything firmly in place.
- Inspect the surface before sealing the frame: Check for dust, fibers, or debris before closing the frame.
One detail that often surprises people is that preservation and conservation are different goals. For decorative display, adhesives and mounting methods are perfectly acceptable. However, in professional archival practices, conservators often avoid permanent adhesives on paper materials so that items remain reversible.
Display Tips For Long-Term Puzzle Preservation
Even after framing, environmental conditions can affect the puzzle over time. Light, humidity, and temperature changes can slowly weaken cardboard materials.
To Help Your Framed Puzzle Last Longer
- Avoid placing the puzzle in direct sunlight
- Keep it away from humid rooms like bathrooms or kitchens
- Hang it on a stable wall surface where temperature changes are minimal
- Consider using UV-protective glazing if the puzzle will be displayed in a bright room
When Puzzle Glue Works Best And When It Doesn’t
Puzzle glue is the most widely used method for preserving a completed puzzle because it bonds the pieces together and seals the surface in one step. When applied correctly, it creates a stable panel that can be safely moved, mounted, or framed.
When Puzzle Glue Works Best
Puzzle glue is ideal when you want to create a permanent, preserved puzzle that will be displayed or framed.
It works especially well when:
- You want to turn a puzzle into wall art
- The puzzle will be framed for long-term display
- The puzzle pieces fit tightly together
- You want the glue to seal the image surface and strengthen the seams
Because jigsaw puzzle glue flows into the gaps between pieces, it bonds the puzzle together and creates a protective layer that helps prevent pieces from separating.
Glue is also useful for medium and large-sized puzzles that need extra reinforcement before framing.
When Puzzle Glue May Not Be The Best Option
In some cases, using glue on the front of the puzzle may not be the ideal choice.
Puzzle glue may not be the best option if:
- You want to preserve the puzzle without altering the surface finish
- The puzzle has a matte or textured image that you want to keep unchanged
- You may want to disassemble the puzzle later
- The puzzle will be secured inside a tight frame with backing support
In these situations, adhesive sheets, painter’s tape backing, or foam board mounting can preserve the puzzle while keeping the image untouched.
A Simple Rule To Follow
A helpful rule many puzzlers use is:
- Use puzzle glue when the puzzle will become permanent wall décor.
- Use adhesive backing methods when you want a cleaner, glue-free surface.
Choosing the right method before starting will help you avoid common issues like uneven finishes, warping, or unnecessary permanent adhesives.
How To Prevent Bubbles, Warping, And Loose Pieces
1. Apply Glue In Thin, Even Layers
Using too much puzzle adhesive is the most common cause of uneven surfaces. Thick layers of glue can trap moisture in the cardboard pieces and create warping or rippling as the puzzle dries.
Instead, apply a thin, even coat of puzzle glue across the surface and spread it carefully with a foam brush or applicator. If needed, apply a second light coat rather than one heavy layer.
2. Check For Bubbles While The Glue Is Still Wet
Air bubbles can appear if glue is applied too quickly or if air becomes trapped between puzzle pieces.
To prevent this:
- Spread the glue slowly from the center toward the edges
- Inspect the surface under bright or angled light
- Smooth bubbles immediately using a spreader or brush
Fixing bubbles while the adhesive is still wet prevents raised spots from forming after the glue dries.
3. Let The Puzzle Dry Completely Before Moving It
Trying to lift or frame a puzzle before the adhesive fully cures can cause pieces to shift or separate.
Even if the surface feels dry, the glue between the seams may still be setting. Always allow the puzzle to dry on a flat, stable surface and give it extra time before moving or mounting it.
4. Reinforce Large Puzzles With Proper Backing
Large puzzles are more likely to flex when lifted or displayed vertically. This is especially common with jigsaw puzzles for adults over 1000 pieces, which tend to be heavier and place more stress on the puzzle seams. Without proper support, even glued puzzles can develop slight bending or sagging over time.
To prevent this, reinforce large puzzles with:
- Foam board backing
- Mounting board
- Adhesive sheets or tape reinforcement
Backing materials help distribute weight evenly and keep the puzzle flat.
5. Protect The Puzzle During The Preservation Process
Small preparation steps can also prevent problems later.
Before applying glue:
- Place wax paper or parchment paper underneath the puzzle
- Ensure all puzzle pieces are fully seated
- Work on a stable, flat surface
These simple precautions help prevent glue from sticking to the table and ensure the puzzle dries evenly.
Common Mistakes To Avoid When Preserving A Puzzle
Using Too Much Puzzle Glue
One of the most frequent mistakes is applying too much puzzle glue. Many people assume a thicker layer will hold the pieces together better, but the opposite is usually true.
Excess glue can:
- Create visible streaks or cloudy spots
- Cause the cardboard to absorb too much moisture
- Lead to puzzle warping or uneven drying
The best approach is to apply a thin, even layer of puzzle adhesive across the surface. You should be sealing the puzzle, not soaking it.
Tip:If the glue pools between puzzle pieces or forms thick patches, spread it out immediately before it starts to dry.
Moving The Puzzle Before It Fully Dries
Another common mistake is trying to move or frame the puzzle too soon. Even if the surface feels dry, the adhesive between puzzle seams may still be curing.
Moving the puzzle too early can cause:
- Pieces to shift out of alignment
- Corners to lift
- The puzzle to bend or crack
To avoid this, let the puzzle dry on a flat, stable surface and follow the drying instructions for your puzzle glue or adhesive sheets. When in doubt, waiting longer is safer.
Skipping A Backing For Large Puzzles
Many puzzlers rely only on glue and forget that large puzzles need structural support. Without backing, even preserved puzzles can slowly sag or flex when hung vertically.
This is especially common with:
- 1000-piece puzzles
- 2000-piece puzzles
- puzzles with thin cardboard pieces
Adding foam board backing, mounting board, or adhesive sheets strengthens the puzzle and keeps it flat over time.
Not Protecting The Surface Before Gluing
Applying glue directly on a table without protection can cause the puzzle to stick to the work surface while drying. Once this happens, removing the puzzle can damage the edges or tear pieces apart.
Always place wax paper, parchment paper, or a puzzle board underneath the puzzle before applying glue. This simple step prevents the adhesive from bonding to the surface below.
Ignoring Bubbles And Uneven Glue
Air bubbles and uneven glue layers may seem minor at first, but once the adhesive dries, they become very noticeable. Bubbles can leave raised spots or dull areas across the puzzle image.
To prevent this:
- Spread puzzle glue evenly with a foam brush or applicator
- Check the surface under bright or angled light
- Smooth out bubbles immediately before the glue sets
A quick inspection during the application stage can prevent permanent surface imperfections.
Choosing The Wrong Preservation Method
Not every puzzle should be preserved the same way. Some puzzles are best sealed with puzzle glue, while others work better with adhesive sheets or foam board mounting.
Choosing the wrong method can lead to problems like:
- glossy surfaces on puzzles meant to stay matte
- puzzles bending inside frames
- unnecessary permanent adhesives
A better approach is to decide how you want to display the puzzle first, framed, mounted, or stored, and then choose the preservation method that supports that goal.
Creative Ideas For Displaying Preserved Puzzles
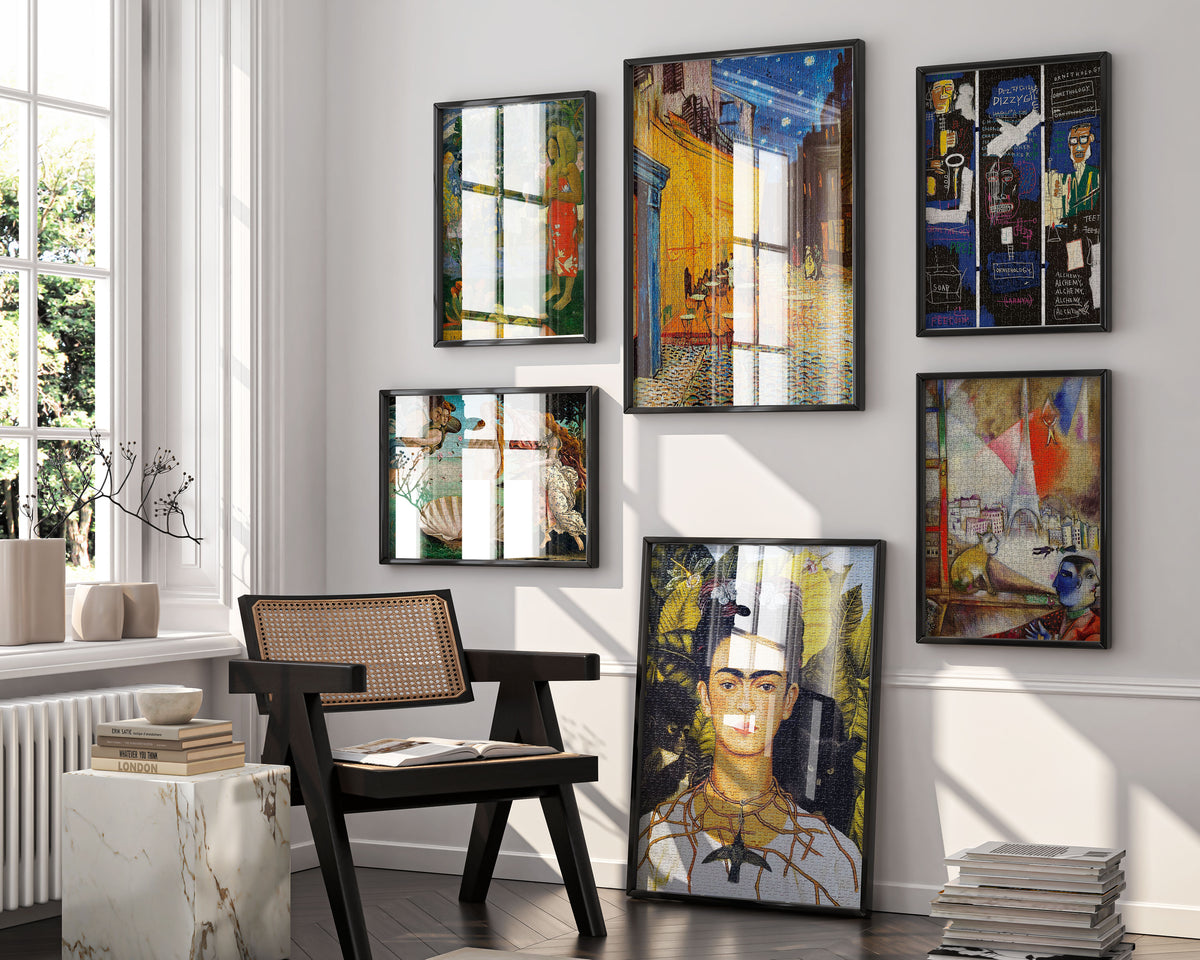
1. Gallery Wall
Turn your preserved puzzles into an eye-catching gallery wall that showcases your creativity and hard work. Start by selecting a mix of intricate and complex puzzlesthat share a common theme, color palette, or design style.
These types of puzzles, with their detailed designs or unique patterns, make a striking visual impact. Frame each puzzle in matching or complementary frames for a cohesive appearance. Arrange them in a grid, row, or asymmetrical layout to suit your wall space and desired aesthetic.
2. Glass Tabletops
A preserved puzzle under glass can serve as a unique and functional décor piece for your home. This approach works exceptionally well for coffee tables, dining tables, or side tables. Start by mounting your preserved puzzle onto a sturdy backing board, ensuring it’s perfectly flat.
Have a custom-cut glass pane made to fit the size of your tabletop, providing both protection and a sleek finish. For a creative touch, you can match the puzzle’s theme to the purpose of the table. For example, a puzzle with a world map design could serve as a stunning centerpiece for a study or travel-themed room.
3. Seasonal Swaps
Rotating preserved puzzles based on the season or occasion keeps your décor fresh and engaging year-round. For example:
- Holidays: Display festive puzzles featuring Christmas scenes, Halloween motifs, or Easter designs to match the holiday spirit.
- Seasons: Use bright floral puzzles in spring, beach or seaside themes in summer, warm-toned autumn landscapes in fall, and snowy winter scenes during the colder months.
- Special Occasions: Showcase puzzles tied to birthdays, anniversaries, or other significant celebrations.
People Also Ask
How Long Does Puzzle Glue Take To Dry?
Most puzzle adhesives dry within 1-2 hours, but allowing 12-24 hours ensures the glue fully cures and strengthens the seams between puzzle pieces.
Can You Take Apart A Puzzle After Gluing It?
No. Once the puzzle glue dries, it bonds the pieces together permanently. Removing it without damaging the cardboard is very difficult, so only glue puzzles you plan to keep intact.
Can You Laminate A Puzzle Instead Of Gluing It?
Laminating is possible but usually not recommended because it can make the puzzle stiff, thick, and harder to frame. Puzzle glue or foam board mounting are more common preservation method.
Final Thoughts
Preserving a puzzle lets you keep the finished image intact and turn it into lasting wall art. The key is choosing the method that fits your goal: puzzle glue for a permanent display, adhesive sheets or tape for a glue-free option, or foam board mounting for extra stability, especially with larger puzzles.
With the right preservation method, your completed puzzle can stay flat, secure, and ready to display for years.
Jump to
The Best Ways To Preserve A Completed Puzzle
How To Preserve A Puzzle With Glue
How To Preserve A Puzzle With Adhesive Sheets Or Tape
How To Preserve A Puzzle With Mounting On Foam Board
How To Frame A Preserved Puzzle
When Puzzle Glue Works Best And When It Doesn’t
How To Prevent Bubbles, Warping, And Loose Pieces
Common Mistakes To Avoid When Preserving A Puzzle
Creative Ideas For Displaying Preserved Puzzles
People Also Ask
Final Thoughts
Latest Articles
Popular Articles